Part 1
The L Stack is a newer type of offensive strategy that has being used sparingly by few teams. It's very uncommon to see an L Stack for beginner teams and is best suited for experienced teams with a speed advantage. A L Stack is exactly what it sounds like, a stack that is shaped like a L. There are many ways to create a L Stack and this example below is just one way of using the strategy
The formation consists of 2–3 handlers back and then a stack of players that are slightly slanted and isolated from one side of the field. The L Stack gives lane cutters and handlers a lot of space to cut on the field. It's almost like a vertical stack but with much more emphasis on having the cutting player isolated on one side. The demonstration below shows a typical vertical stack turning into a L stack.
This L Stack above is actually just like a flooded stack. In fact, it is good to treat the L Stack as a form of isolation. Thus, a L Stack is best suited for athletic teams that prefer 1 on 1 match ups with lots of space to cut. This is just a brief look at the L Stack but we'll be following this up with another look at how the L Stack flows. It's meant to be a very dynamic stack that allows handlers and lane cutters to fill into each others position.
Key Points:
- Focus on isolating a space of the field for cutting and less on the formation.
- Players not in the lane must be viable options to keep poachers at bay.
- Handlers are encouraged to flow into the play and cut up field.
Part 2
Following the first article on the L Stack this article looks at the flow of this offence in more detail. As stated before, the L stack is a flowing offence that is best suited for advanced teams where any player can be a lane cutter or handler. That being said, it doesn't mean that every player needs to be equally good at lane cutting or handling, but the gist of it is that if you watch any top level team you'll notice every player can huck, break the force, cut, dump and get open.
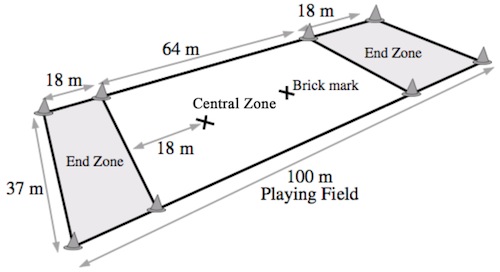
The L Stack can form the long "l" on any side of the force, the demonstration below shows the stack forming on the open side. By forming on the open side, the handler must make a break force throw to the first lane cutter who should have a lot of room to cut. From the first break it will be very hard for the defence to adjust, unless they are already practicing a high degree of poaching. The animation below shows the perfect scenario where the first break, leads to an easy second break pass up the field. Following this, the stack adjusts back into the L formation still leaving the defence in no position to cover an end zone goal. These passes must be run at a very fast pace such that the defenders are scrambling to reorganize and keep the force away.
The animation above demonstrates the perfect scenario, one single break force throw leads to a complete breakdown in the defence where they cannot stop the quick gains up the field. As mentioned, if the defence catches on, which is very likely, poaching will stop the breakside from occurring. In this instance, the open side throw should be made. If you can imagine, the first cut is shut down due to poaching, player 1 or player 2 on offence could cut open side easily. The L stack can adjust and flip to the other side or they can continue to force the break side option. Another option is for handler 4 to make a cut up field which would give the player a stall count or two to throw a breakforce throw.
Key Points:
- Focus on isolating a space of the field for cutting and less on the formation.
- Every player must be aware of the cutting player to isolate the lane.
- Every player must have the ability to throw and lane cut.
- The breakforce throw should be first priority.
- Up the field cuts open up easy throws as the defender will be scrambling to get a mark on.
Источники:
http://www.ultimatehandbook.com/blog/2009/04/01/offence-l-stack-isolation/
http://www.ultimatehandbook.com/blog/2009/04/06/offence-l-stack-isolation-part-2/
 Броски
- Вертикальный стек
- Еще про вертикальный стек
- Стратегии
- Горизонтальный стек
- Игра в голевой зоне
- Правильное движение по полю
- Правильное открытие на диск
- Продвижение диска
- Horizontal Flood Out
- Horizontal Isolation
- L Stack Isolation
- Break Force Funnel
- «Открывания и обманки»
- «Зоркость хэндлера»
- «В поисках твёрдой концептуальной основы»
- О катах от Дмитрия Подольского
- Персональная защита (форс)
- Зонная защита
- Еще про зонную защиту
- Свитч и Поуч
- Гибридная защита
- Советы маркеру
- Защита против вертикального стека
- Защита голевой зоны
- “Go Get It” — советы защитнику
- Vertical Switching
- Horisontal Switching
- «Защита выигрывает чемпионаты»
- 4 принципа защиты
- Как играть против суперзвезды
- Основные понятия персональной защиты
- Catch your D's
- Как читать поле, чтобы лучше обороняться
- Максимальная отдача от маркинга
- Разминка
- Базовые упражнения
Упражнения для прыгучести- Полезные советы
- Еще полезные советы
- Советы Josh Ziperstein
- 15 советов новичку
- «Революционный подход к тренировкам»
- Физические тренировки от Revolver
- Алтикардс
- Лейауты
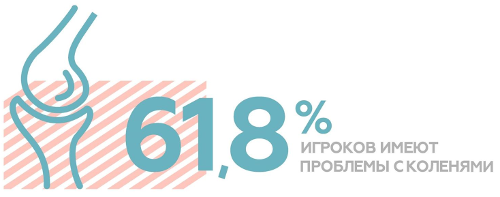
Травмы в алтимате- Физическая подготовка с алтиматовской спецификой
- Cutting Tree